ESP32-CAM Devboard Modification
// Published on May 15, 2026
Pictures
(I forgot to take a picture of the final camera… To be added in a few days)
What is it?
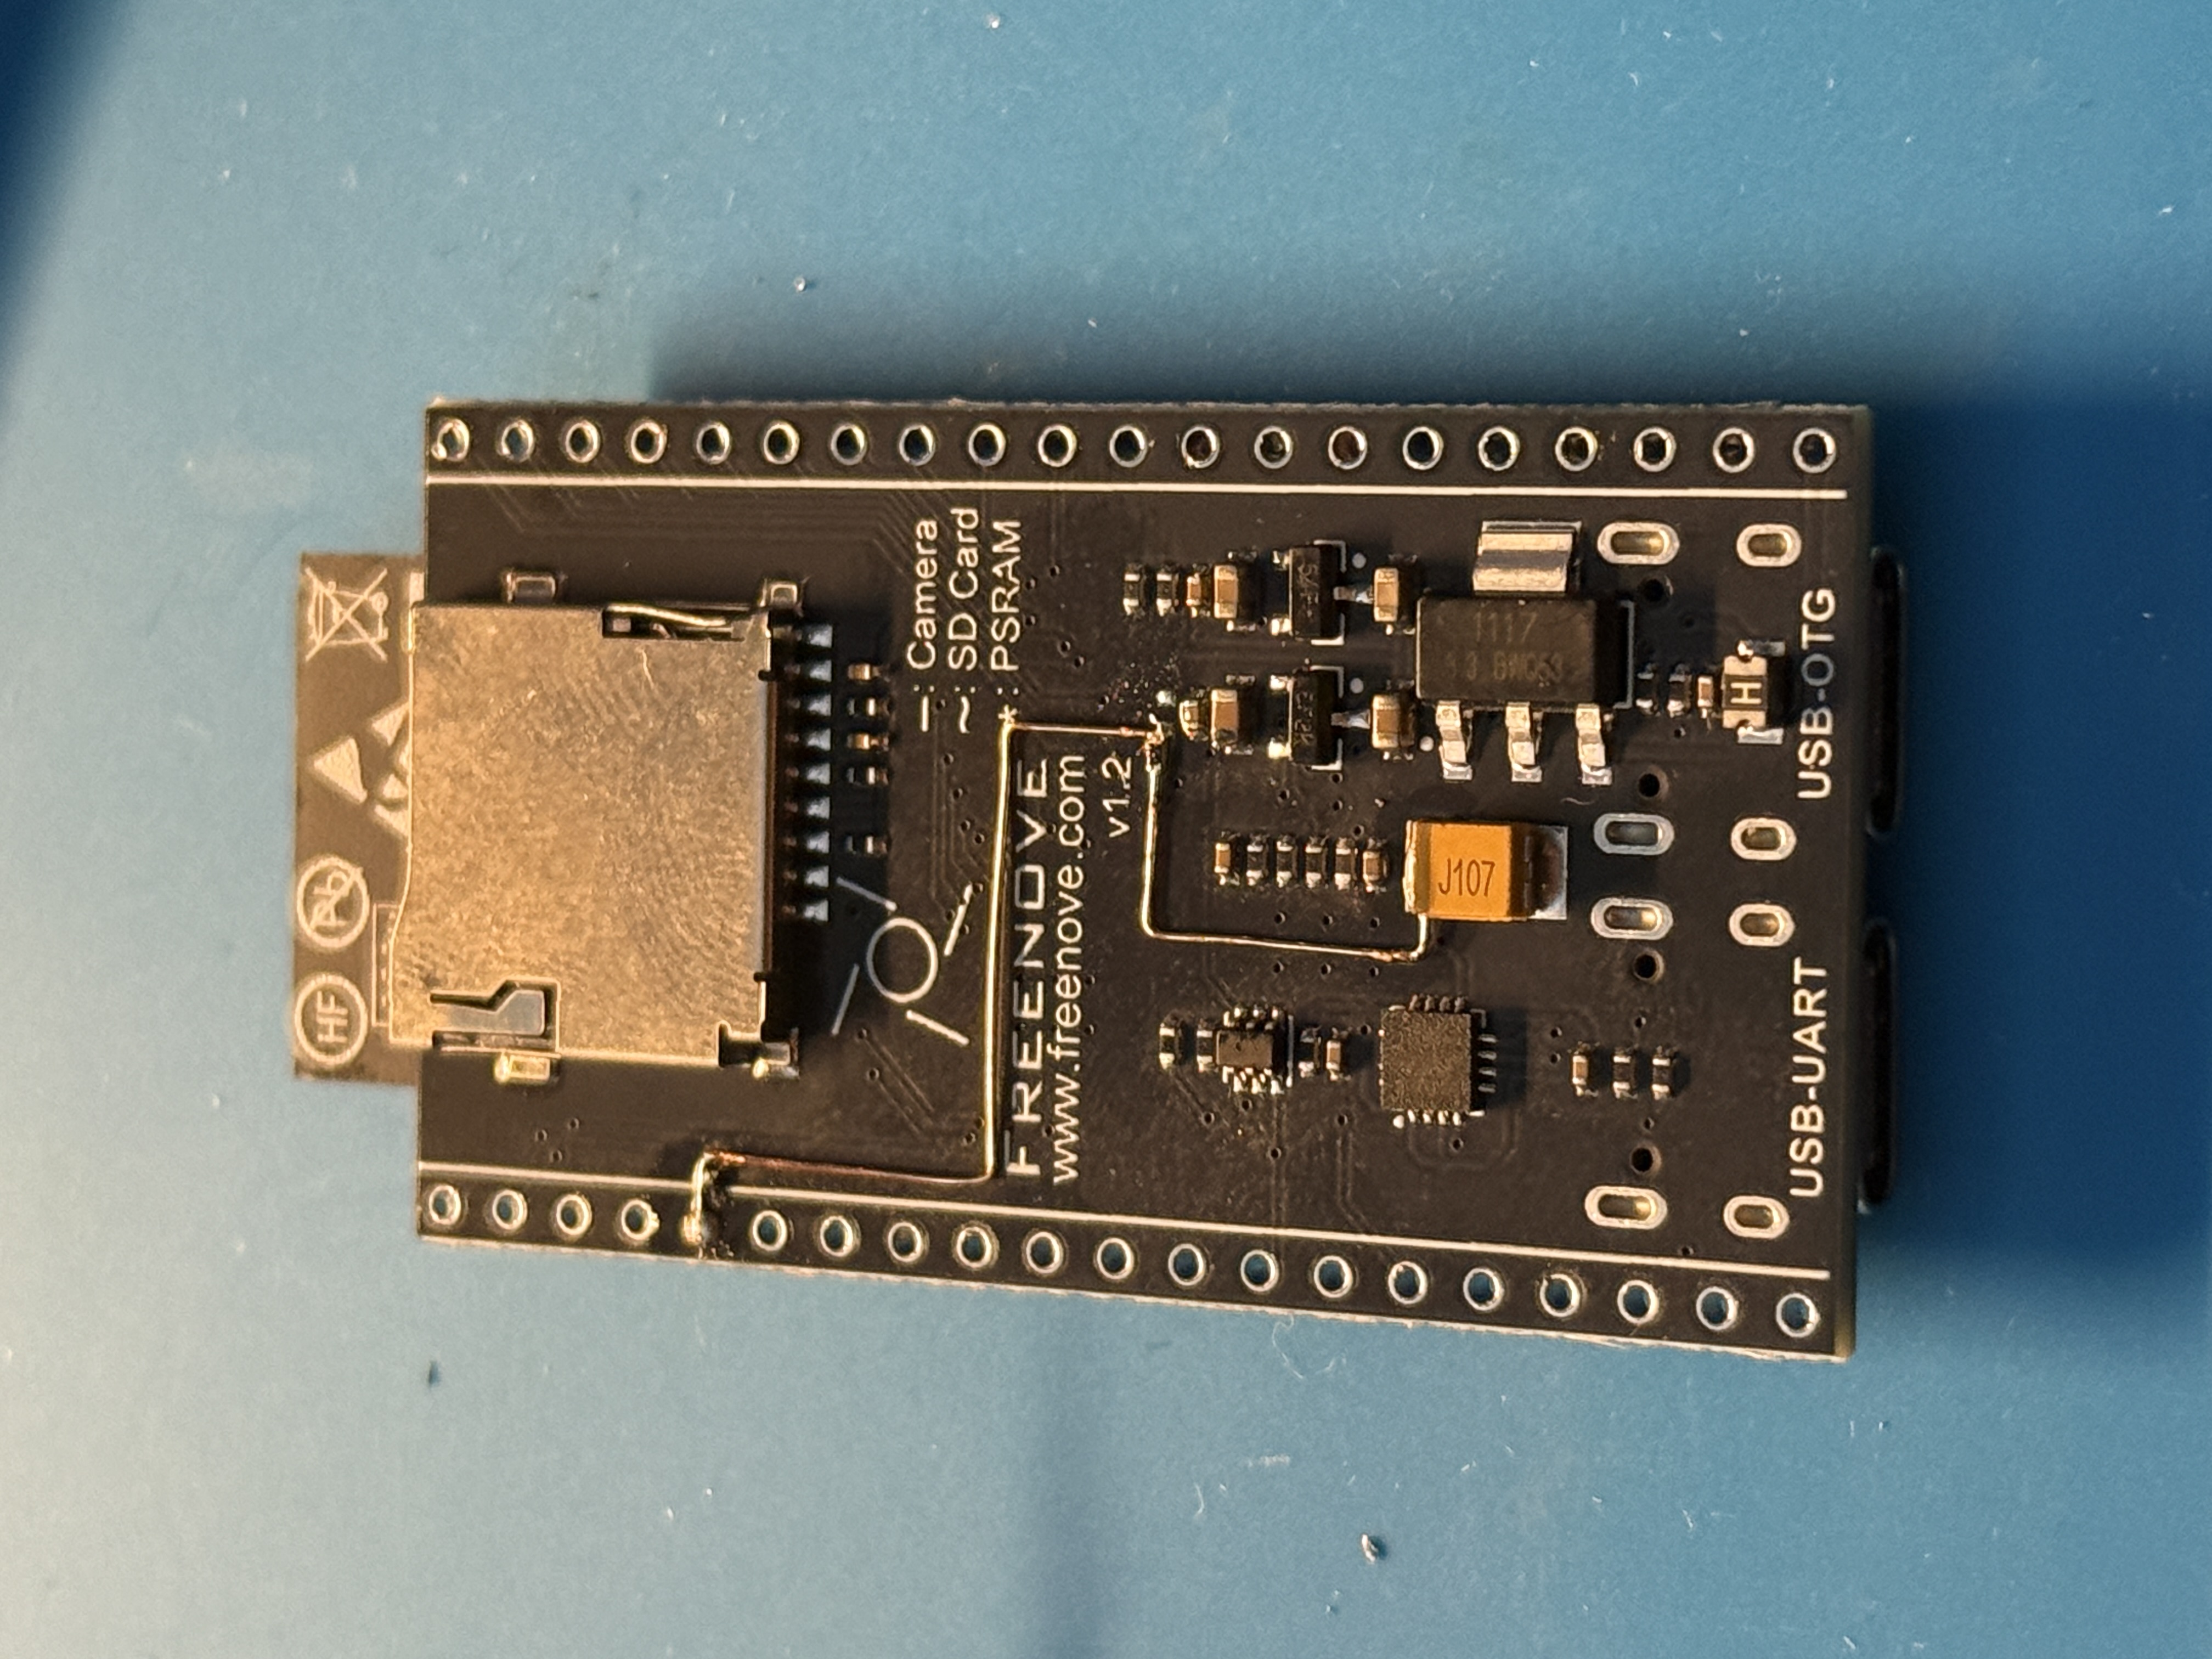
I bought two Freenove ESP32-CAM modules off Amazon and I had about a week to write the firmware and complete the deliverable (which was a small pocket camera with ridiculous battery life and WiFi). I don’t usually opt for using devboards in a final product, but the timing was a little tight and I figured since the Freenove board had 4k good reviews it wouldn’t be too bad of an idea.
Funky 0402 Rework
Quiescent current was of great concern since this was meant to be a battery powered device. The 1S charger boards with a built in boost converter (TP4056 based, unfortunately) did not have much IQ themselves (see below).
However what did eat a lot of my power was the devboard. the Freenove ESP32-CAM is terrible because the onboard camera has an enable pin that is TIED TO GROUND so it is ALWAYS ON.
So even if I have flawless firmware on the ESP32 and it draws maybe 400uA itself, the camera will eat 11mA.
That’s just a few days of sitting in a drawer and my 18650 is dead.
Here’s the fix:
- Look for a OV3660 datasheet for its pinout
- Confirm connections via continuity meter to ESP32 pads
- Probe around until the EN trace is found (it should be tied to GND via 10k)
- Desolder 10k, route it to a free GPIO with 10k 3V3 pullup so it is disabled if ESP32 goes to sleep
I don’t like to rework 0402s if I can help it, but I’ve gotten very used to it. A few more months of this and I will develop microscopic vision.
Amazon TP4056 Modules Are Trash
The one I bought has no overdischarge protection, and so basically my device would enter a brownout loop should the battery be fully drained because the TP4056 will only let through a small amount of current to try and necromance the battery, which is enough for the ESP32 to power on and try to turn on the display. As soon as the display’s backlight turns on, the ESP32 browns out.
Thus, if the battery is fully discharged, the device would brownout loop forever.
I did not want to do any microsoldering again, so I fixed this by having the init sequence (turning on display, init camera, mounting SD Card) gated by a brownout detector that writes into nonvolatile storage the number of times it tried to turn on.
Here’s how it works:
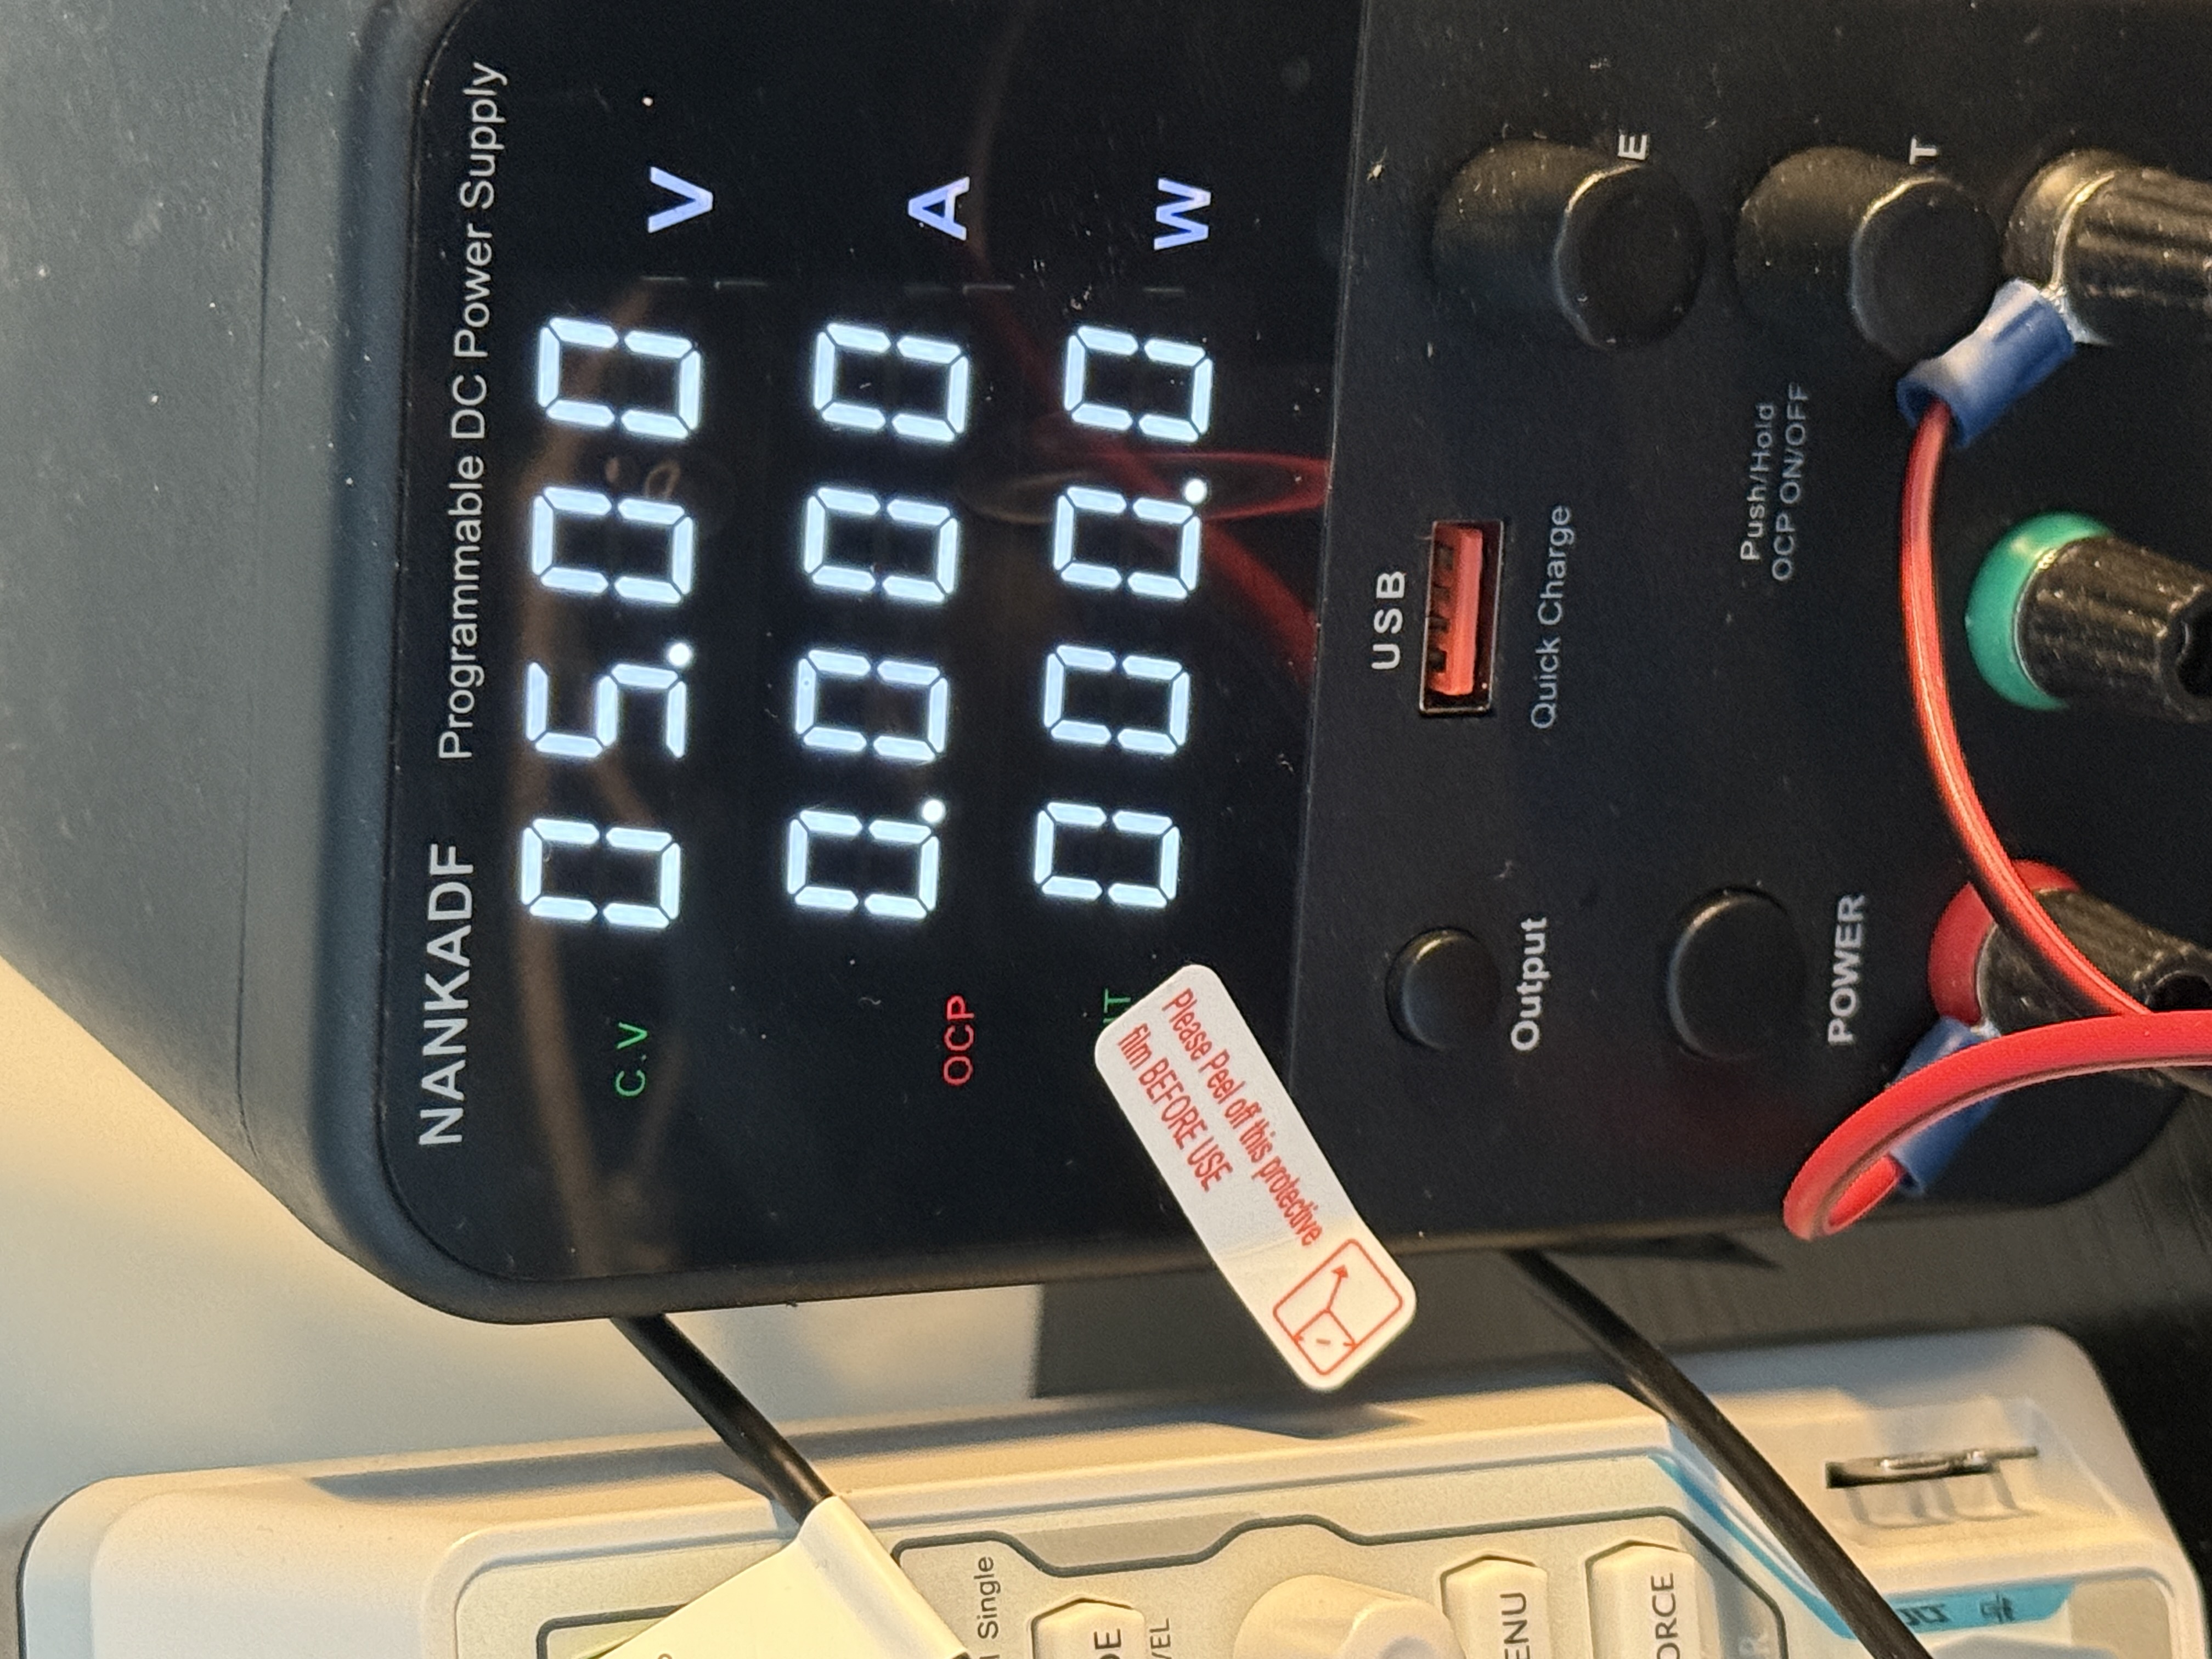
- For testing, I used 5V @ 70mA current limit on my PSU.
- User presses the shutter button, Wake (EXT0 / timer / POWERON) → setup() runs.
- Brownout gate — if last reset was BROWNOUT: bump RTC counter, hold pins, sleep (1 or 2 min). Done.
- Release prior GPIO holds.
- Stress test — BL HIGH 60 ms; if supply sags (to 3.1V or less), brownout fires here.
- NVS counter — option A clears on real POWERON, option B increments capped at 3.
- Bootloop gate — if NVS ≥ 3: button held clears it, otherwise sleep.
- Init — canvas → SPI → SD → display → camera.
- Splash text for display.
- End of setup — clear both counters.
- loop() — viewfinder, capture, etc.
- Idle/sleep — clean teardown, EXT0 armed, deep sleep.
microSD Standards
And to top it off, the 1GB SD card the Freenove ESP32-CAM came with is a piece of trash and does not conform to SD card standards. It’s IQ is 10mA and you can’t get around this unless you gate the power (which would require at least one SOT23 and cutting a PCB trace). So, if you want to use this particular devboard for your battery powered applications, buy a reputable SD card instead.
Onshape…
TBA